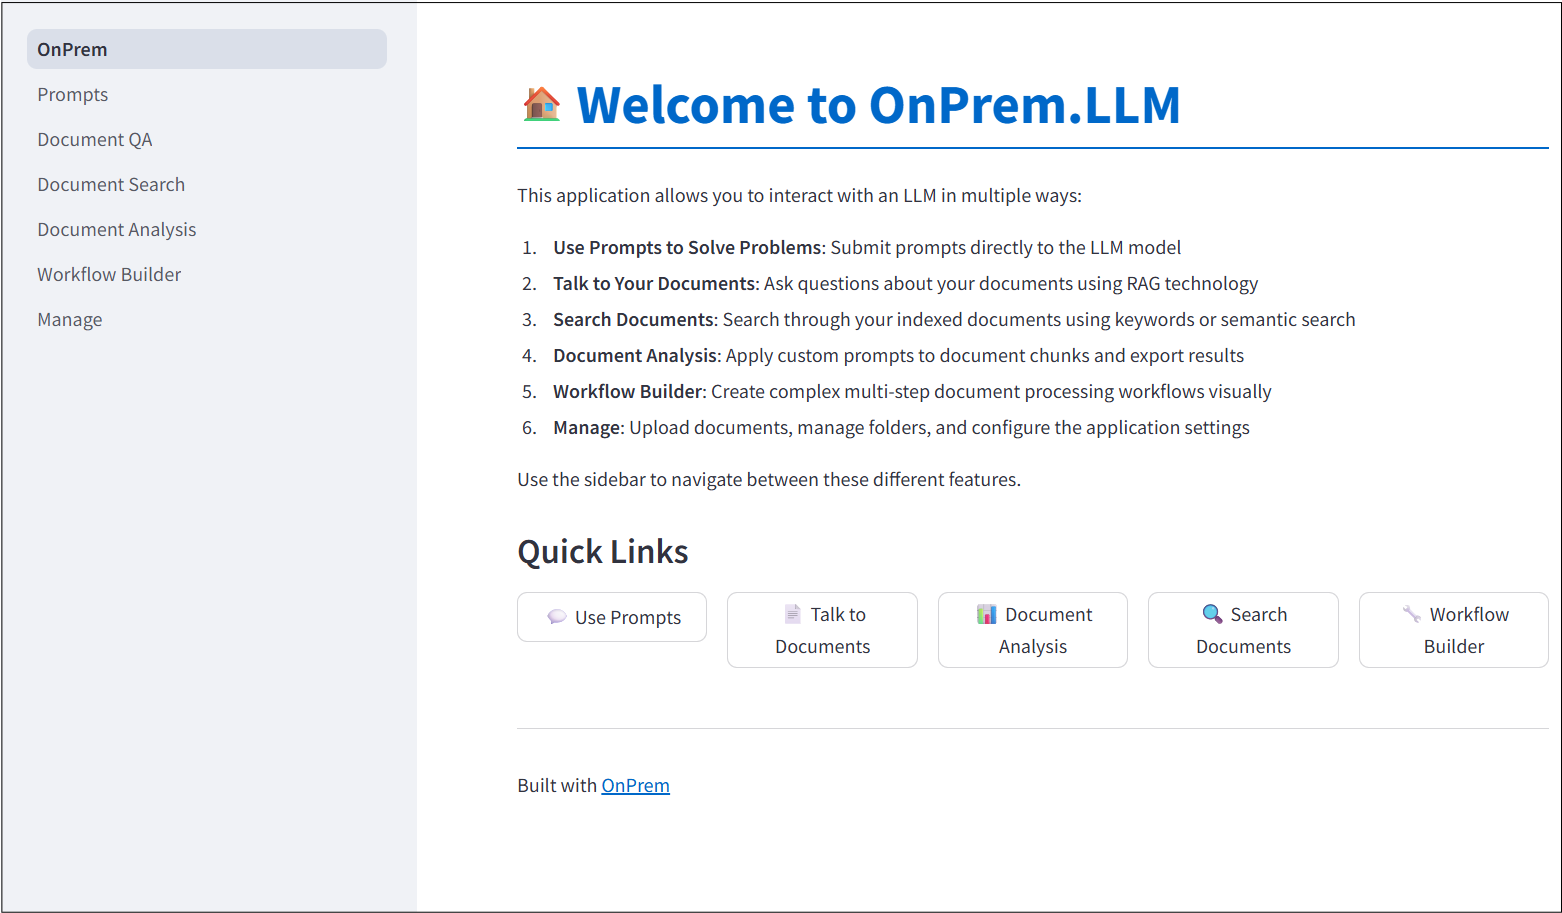
A Built-In Web App
OnPrem.LLM includes a built-in web app to easily access and use LLMs. After installing OnPrem.LLM, you can start it by running the following command at the command-line:
# run at command-line
onprem --port 8000
Then, enter localhost:8000 in your Web browser to access the application:
The Web app is implemented with streamlit: pip install streamlit. If it is not already installed, the onprem command will ask you to install it. Here is more information on the onprem command:
$:~/projects/github/onprem$ onprem --help
usage: onprem [-h] [-p PORT] [-a ADDRESS] [-v]

Start the OnPrem.LLM web app
Example: onprem --port 8000

optional arguments:
  -h, --help            show this help message and exit
  -p PORT, --port PORT  Port to use; default is 8501
  -a ADDRESS, --address ADDRESS
                        Address to bind; default is 0.0.0.0
  -v, --version         Print a version
The app requires a file called config.yml exists in the onprem_data/webapp folder in the user’s home directory. This file stores information used by the Web app such as the model to use. If one does not exist, then a default one will be created for you and is also shown below: or FALSE) show_manage: TRUE
# Default YAML configuration
llm:
  # model url (or model file name if previously downloaded)
  # if changing, be sure to update the prompt_template variable below
  model_url: https://huggingface.co/TheBloke/zephyr-7B-beta-GGUF/resolve/main/zephyr-7b-beta.Q4_K_M.gguf
  # number of layers offloaded to GPU
  n_gpu_layers: -1
  # the vector store type to use (dual, dense, or sparse)
  # dual: a vector store where both Chroma semantic searches and conventional keyword searches are supported
  store_type: dual
  # path to vector db folder
  vectordb_path: {datadir}/vectordb
  # path to model download folder
  model_download_path: {datadir}
  # number of source documents used by LLM.ask and LLM.chat
  rag_num_source_docs: 6
  # minimum similarity score for source to be considered by LLM.ask/LLM.chat
  rag_score_threshold: 0.0
  # verbosity of Llama.cpp
  # additional parameters added in the "llm" YAML section will be fed directly to LlamaCpp (e.g., temperature)
  #temperature: 0.0
prompt:
  # The default prompt_template is specifically for Zephyr-7B.
  # It will need to be changed if you change the model_url above.
  prompt_template: <|system|>\n</s>\n<|user|>\n{prompt}</s>\n<|assistant|>
ui:
  # title of application
  title: OnPrem.LLM
  # subtitle in "Talk to Your Documents" screen
  rag_title:
  # path to markdown file with contents that will be inserted below rag_title
  rag_text_path:
  # path to folder containing raw documents (i.e., absolute path of folder you supplied to LLM.ingest)
  rag_source_path:
  # base url (leave blank unless you're running your own separate web server to serve sour
  # whether to show the Manage page in the sidebar
  show_manage: TRUE
You can edit the file based on your requirements. Variables in the llm section are automatically passed to the onprem.LLM constructor, which, in turn, passes extra **kwargs to llama-cpp-python or the transformers.pipeline. For instance, you can add a temperature variable in the llm section to adjust temperature of the model in the web app (e.g., lower values closer to 0.0 for more deterministic output and higher values for more creativity).
The default model is a 7B-parameter model called Zephyr-7B.
If you’d like the LLM to support longer answers than the default 512 tokens, you can add a max_tokens parameter to the llm section.
If using Ollama as the LLM engine, you can replace the default model_url entry with something like:
llm:
    model_url: http://localhost:11434/v1
    model: llama3.2
    api_key: na
You can also set the model_url or model_id parameter to point to a model of your choosing. Note that some models have particular prompt formats. For instance, if using the default Zephyr-7B model above, as described on the model’s home page, the prompt_template in the YAML file must be set to:
prompt:
  prompt_template: <|system|>\n</s>\n<|user|>\n{prompt}</s>\n<|assistant|>
If changing models, don’t forget to update the prompt_template variable with the prompt format approrpriate for your chosen model.
You do not need a prompt_template value if using Ollama or transformers as the LLM engine.
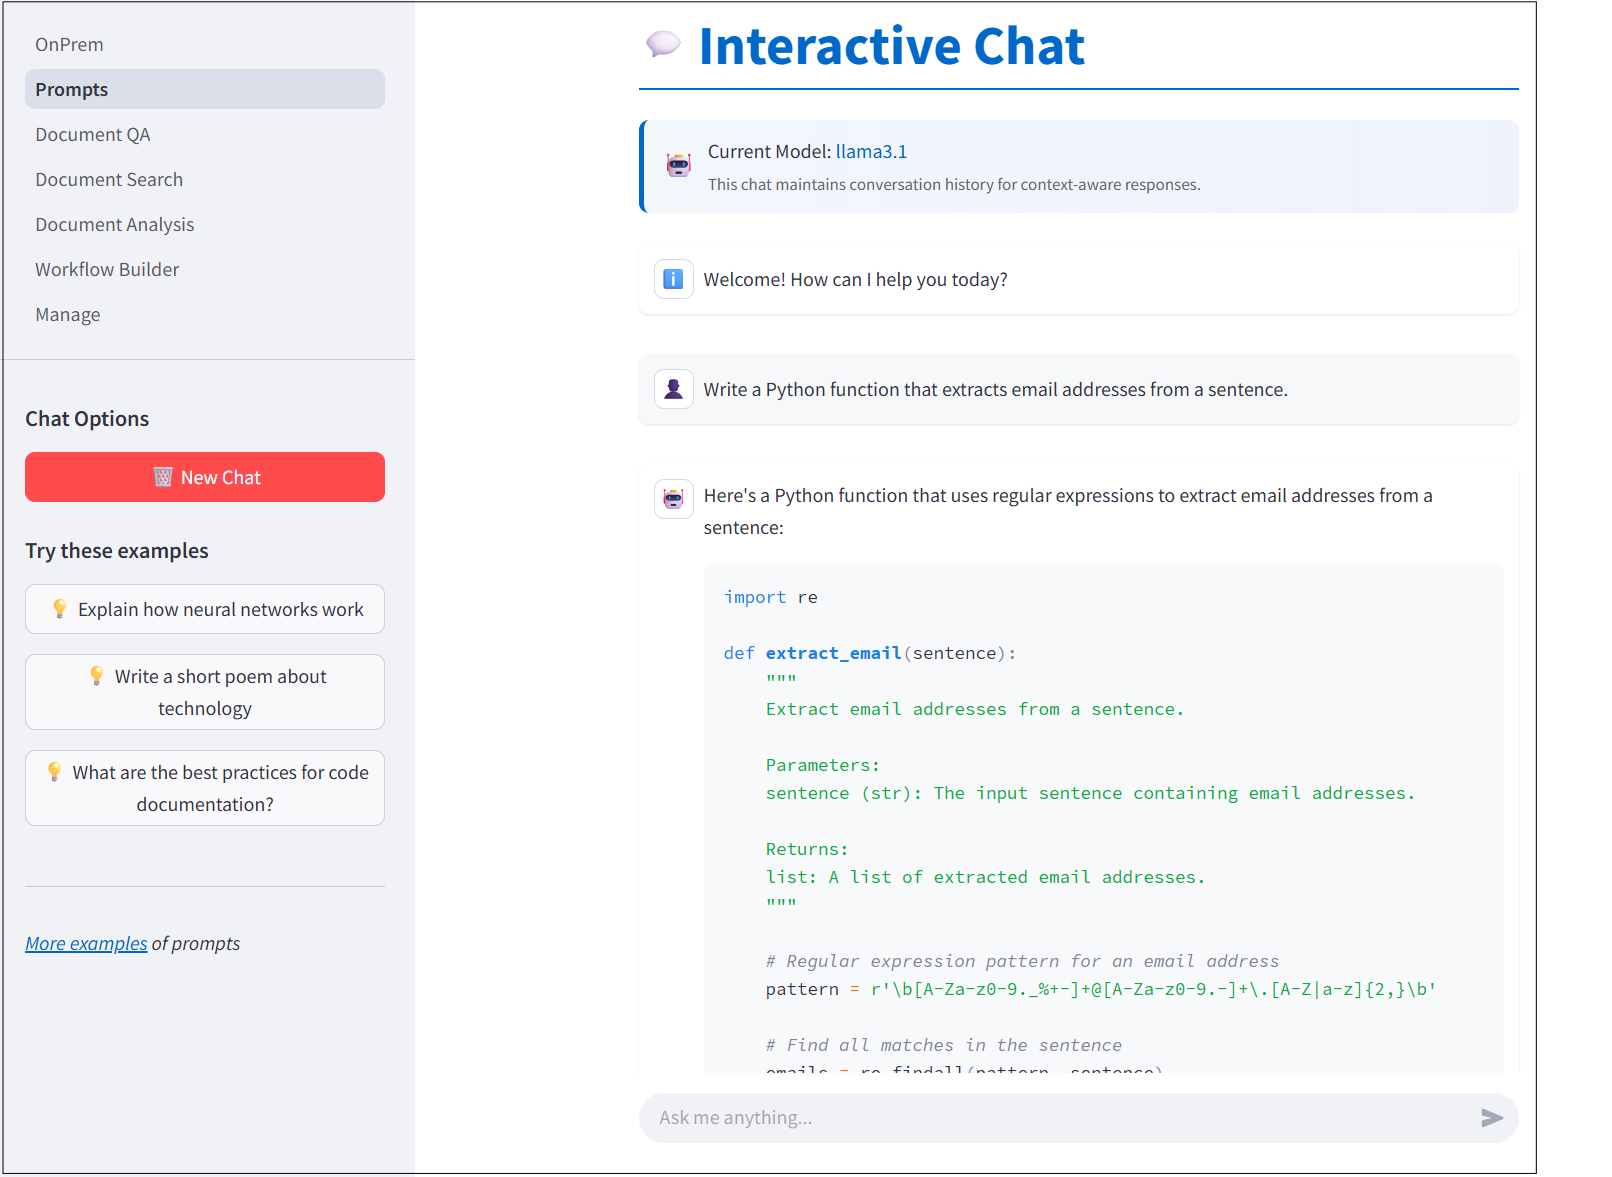
Using Prompts to Solve Problems
The first app page is a UI for interactive chatting and prompting to solve problems various problems with local LLMs.
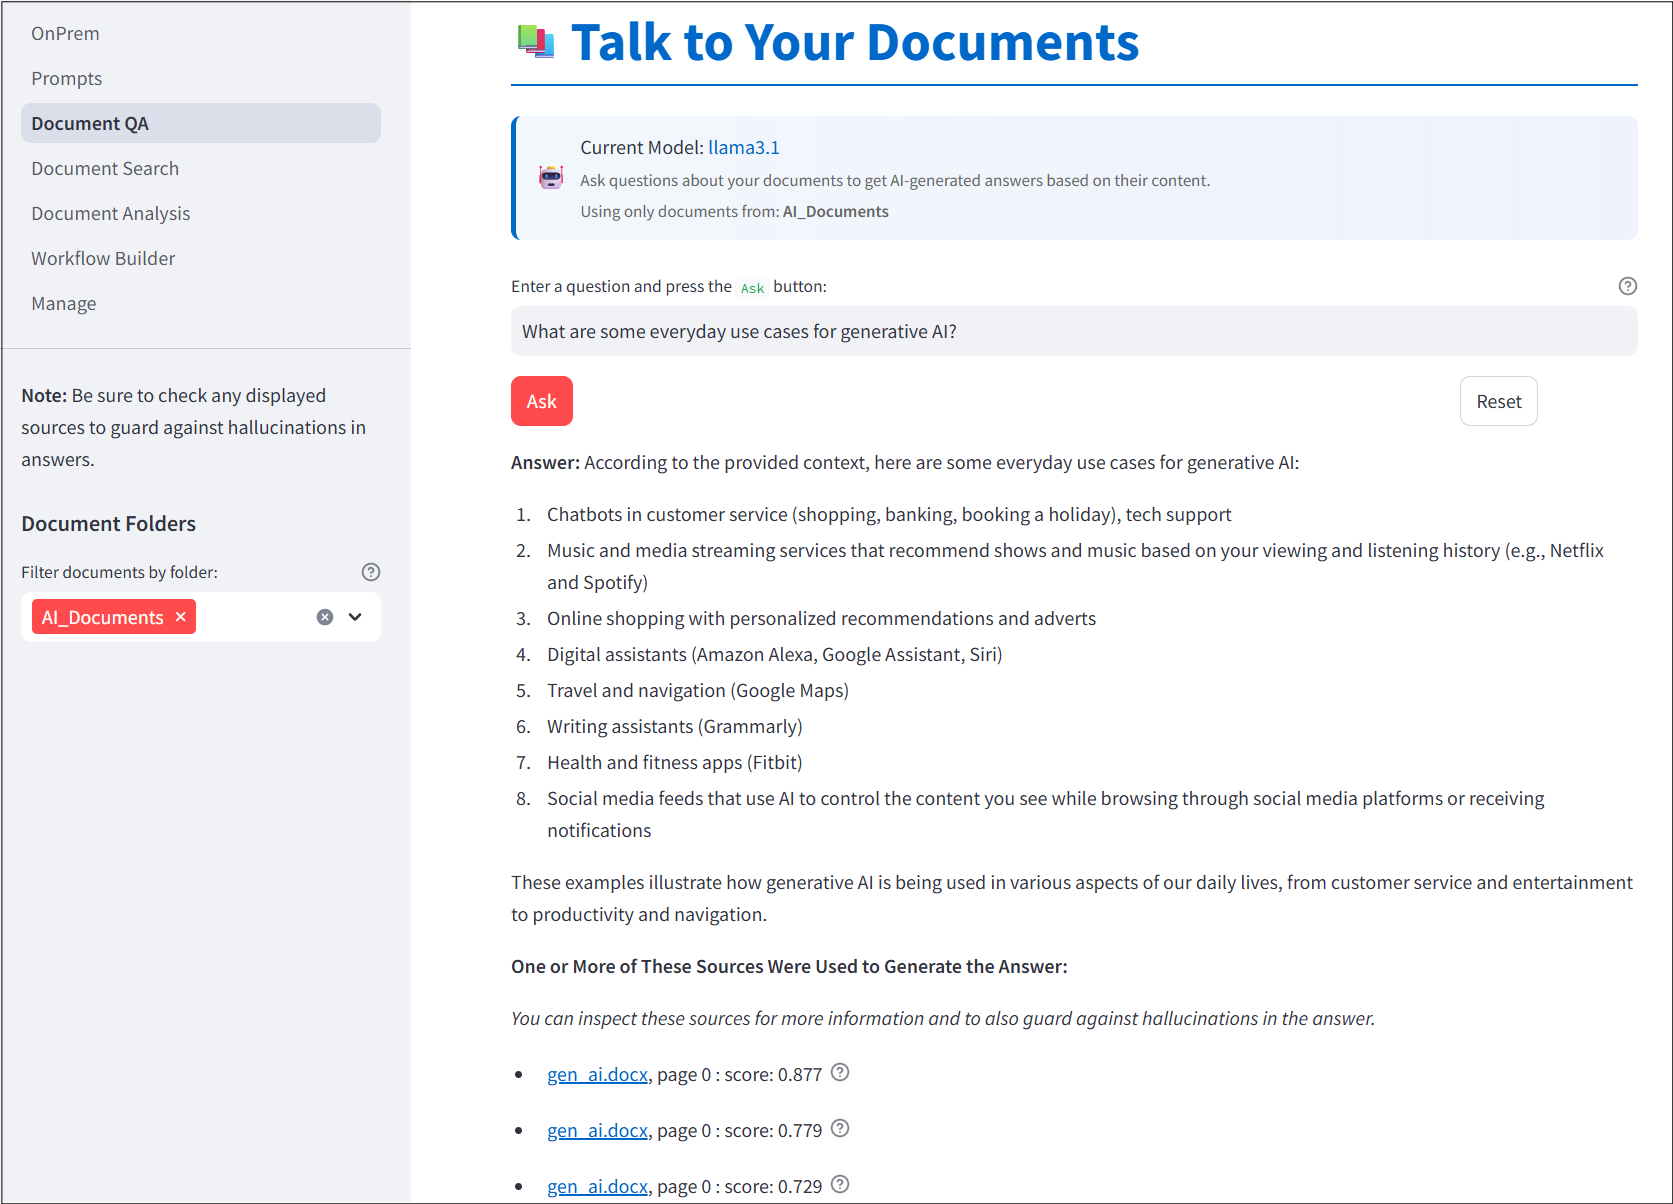
Talk To Your Documents
The second screen in the app is a UI for retrieval augmented generation or RAG (i.e., chatting with documents). Sources considered by the LLM when generating answers are displayed and ranked by answer-to-source similarity. Hovering over the question marks in the sources will display the snippets of text from a document considered by the LLM when generating answers. Documents you would like to consider as sources for question-answering can be uploaded through the Web UI and this is discussed below.
Document Search
The third screen is a UI for searching documents you’ve uploaded either through keyword searches or semantic searches. Documents that you would like to search can be uploaded through the Web app and is discussed next.

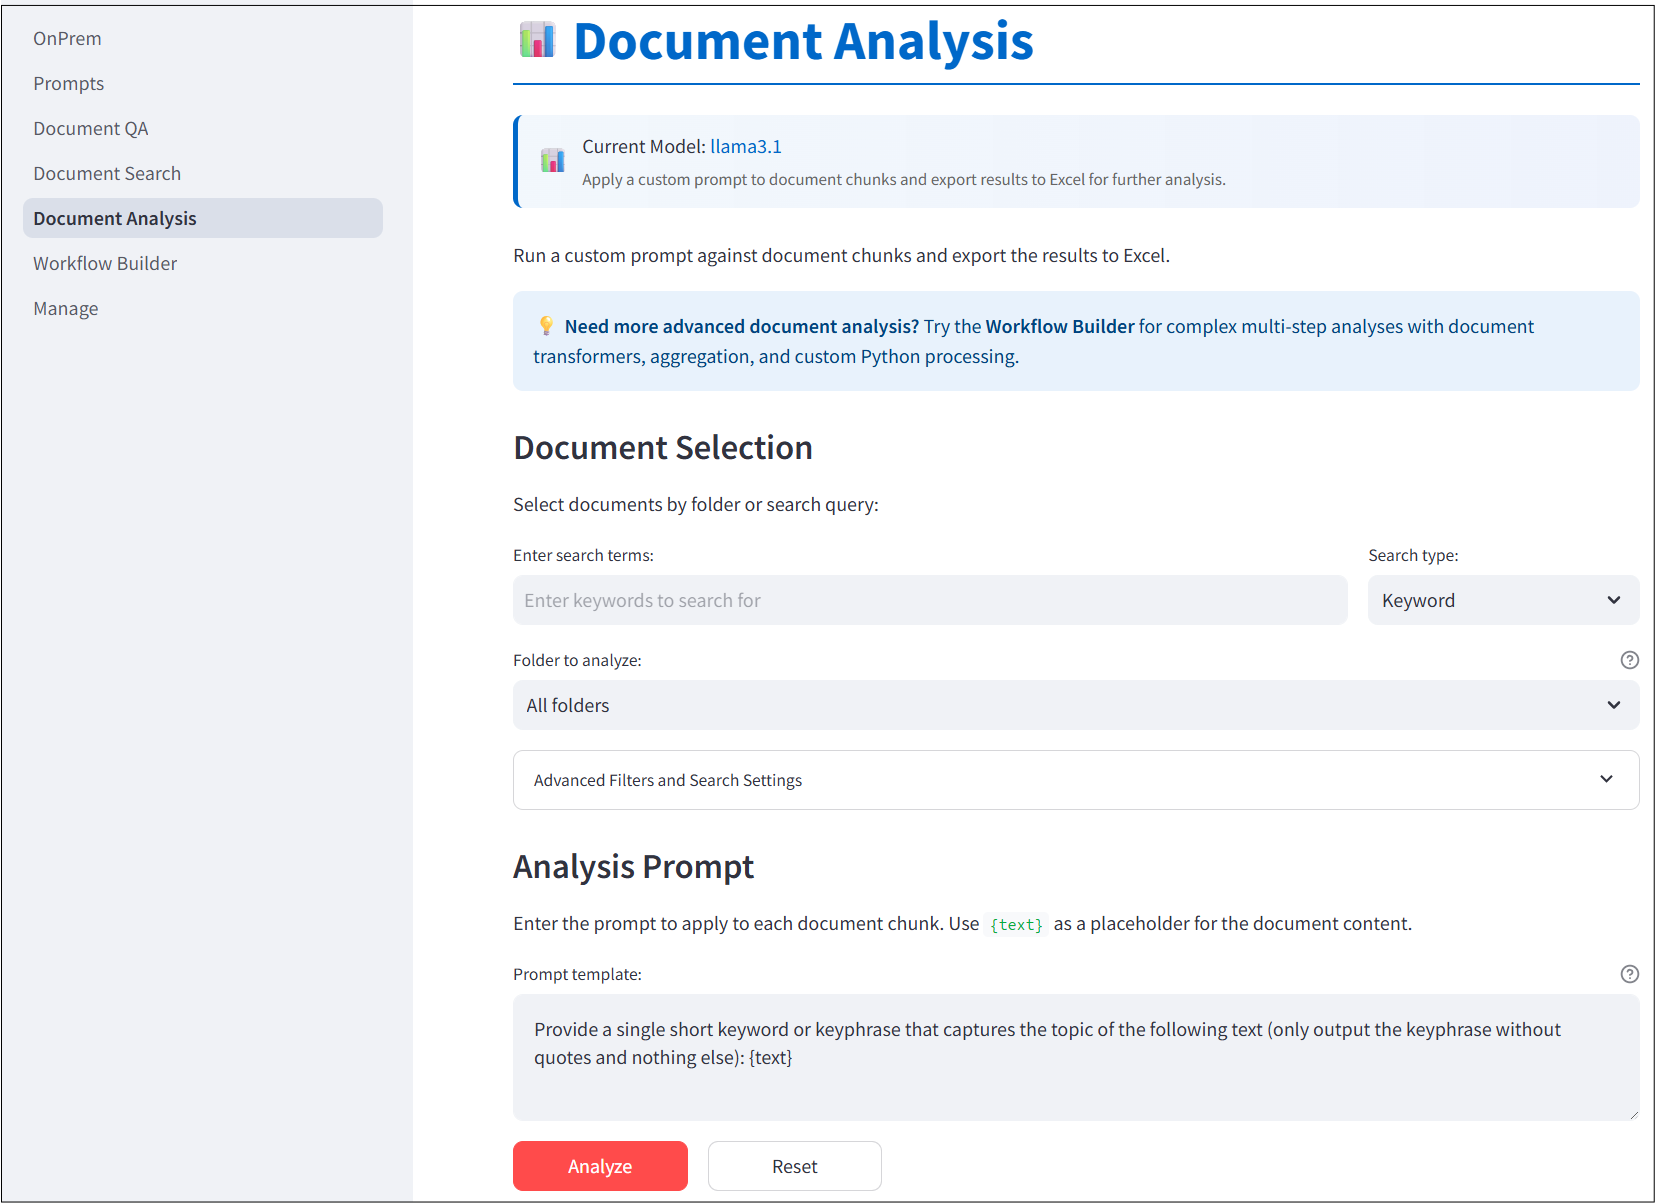
Document Analysis
The fourth screen is a UI for applying prompts to passages within uploaded documents.
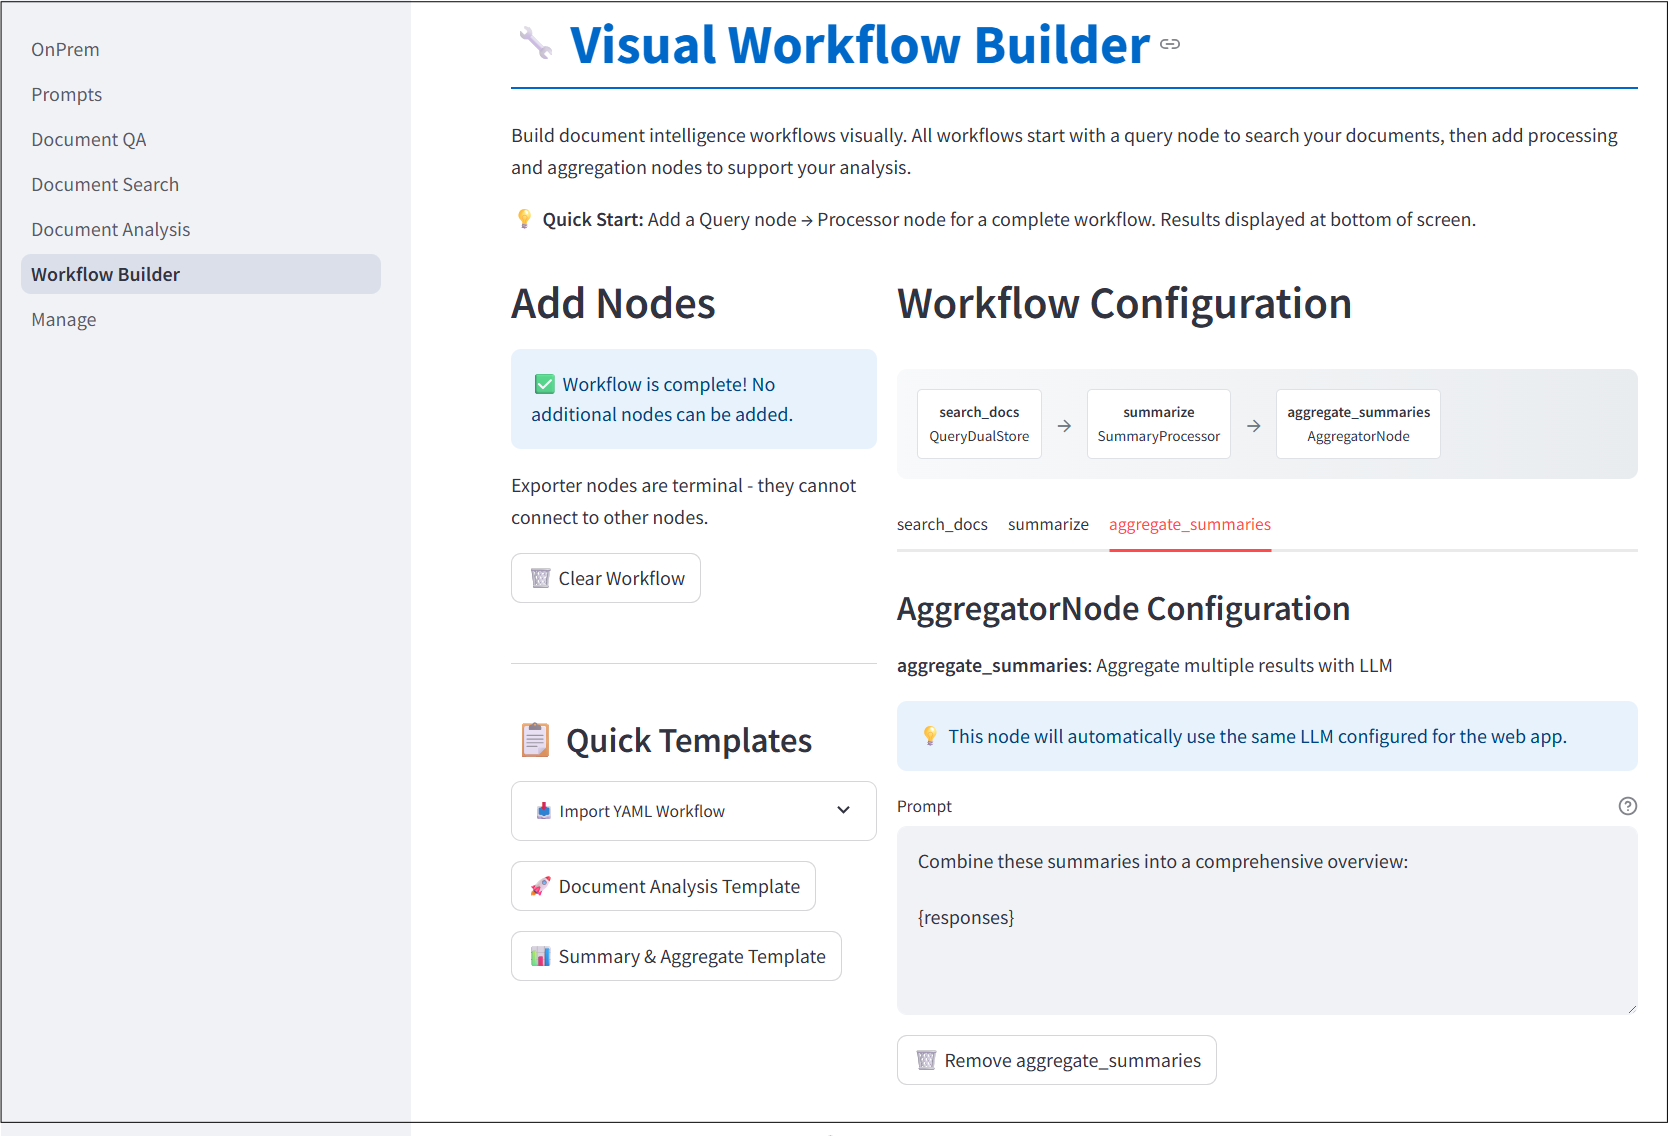
Workflow Builder
The Visual Workflow Builder allows users to craft complex data analysis pipelines purely through a point-and-click interface with no coding required.
Ingesting Documents
Both document search an document question-answering, as discussed above, require you to ingest documents into a vector store. By default, the web app uses a dual vector store that stores documents in both a conventional vector database (for semantic search) and a search index (for keyword searches).
You can ingest documents either manually or through a Web interface.
Uploading Documents Through the Web Interface
The Web UI includes a point-and-click interface to upload and index documents into the vector store(s). Documents can either be uploaded individually or as a zip file.

Ingesting Documents Through the Python API
You can also ingest documents through the Python API. By default, the web app assumes that the original documents are stored in <home directory>/onprem_data/webapp/documents and assumes the vector stores reside in <home directory>/onprem_data/webapp/vectordb. We just need to point LLM to these places when ingesting documents. Let’s assume you copied your project documents to /home/<username>/onprem_data/webapp/documents/my_project_files. You can ingest them, as follows:
from onprem import LLM
llm = LLM(store_type='dual', vectordb_path='/home/<username>/onprem_data/webapp/vectordb')
llm.ingest('/home/<username>/onprem_data/webapp/documents/my_project_files')
After the above commands complete, you should be able to search your documents and ask them questions after starting the Web app:
onprem --port 8000Tips
If you’re finding answers get cut off, edit the configuration to set
max_tokensto higher value than the default 512. (Not necessary when using Ollama, which uses a larger value by default.)You can change the store type in the config to
store_type="sparse", which stores documents in a traditional search engine index, instead of a vector database. The advantage is that ingestion is a lot faster. The drawback is that sparse vectorstores assume passages with answers will include at least one word in common with the question.For reasons that are unclear, parallelized ingestion in the Web interface when running on Windows 11 tends to pause for a long while before starting. For these reasons, parallelization is disabled for the Web interface when running it on Windows 11. When running on Windows systems, we recommend ingesting documents through the Python interface.